Building a personal website using Jekyll and GitHub Pages
GitHub has a feature called Pages which essentially lets you turn a repository full of markdown files into a website (like the one you’re on now). Seeing as I have very little web dev experience but feel relatively comfortable writing markdown, Pages seemed like a great way to get the feel of a custom personal website with GitHub handling most of the nitty-gritty backend details. It’s also free, which fit my budget.
A personal website can be like a digital business card. I use mine as a blog and portfolio of both writing samples and the work I’ve done on the site. It’s a powerful professional tool and an outlet for creativity.
If you have some coding experience and don’t mind using command line tools, GitHub Pages and Jekyll might be worth considering if you want to build your own website.
Here’s what worked for me:
1. Prerequisites
After installing Git and Ruby, download Bundler. Bundler is a utility that manages some backend tasks (like keeping the Ruby gemfiles up to date and making sure Jekyll builds execute properly) to reduce build errors or environment issues.
GitHub recommends using Bundler to install Jekyll. From the root folder of your site project, run the following command:
$ bundle install jekyll
2. Follow GitHub's getting started
Follow [the setup guide][guide] on the Pages website:
Create your repository.
For individual and organization pages, the repository must be named username.github.io where username is your GitHub username. These websites will publish from the master branch of the repository. Project pages can publish from a gh-pages branch or a docs folder, but I’m only covering individual/organization pages in this guide.
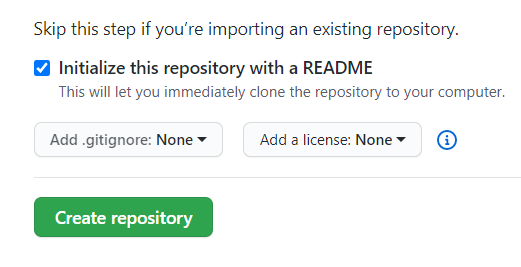
When initially setting up the repository for Pages on GitHub, the instructions walk you through configuration but don’t explicitly say whether or not to create the repo. When you get to that point, initialize with a README (unless you’re importing a repository) and click ‘Create’.
Create your Jekyll site
-
Using your Git tool of choice, navigate to the root folder containing your soon to be website. Initialize it as a Git repository with the following command, replacing REPOSITORY-NAME with your repository name:
$ git init REPOSITORY-NAME > Initialized empty Git repository in /Users/anthony/mandelliant.github.io/.git/ -
Because this is a personal/organizational Pages site, the
masterbranch is your live website. Check you’re on the right branch withgit branch.$ git branch > * masterOnce you’re in the right folder and on the right branch, use the following Jekyll command to create the website:
$ bundle exec jekyll VERSION new .. Replace VERSION with the current dependency version GitHub Pages requires. -
Open the Gemfile and follow the instructions in the code comments to configure it for GitHub Pages. The GitHub guide then says to update the
gemline to:gem "github-pages", "~> VERSION", group: :jekyll_plugins, again replacing VERSION with the current dependency version. I couldn’t get that to work, so I left off the VERSION entirely and that seemed to do the trick. I’m not necessarily endorsing that as the correct course of action, but I haven’t run into any issues.This is what the relevant lines of my Gemfile look like after updating:
 # If you want to use GitHub Pages, remove the "gem "jekyll"" above and
 # uncomment the line below. To upgrade, run `bundle update github-pages`.
 gem "github-pages", group: :jekyll_plugins
 # If you have any plugins, put them here!
 group :jekyll_plugins do
   gem "jekyll-feed", "~> 0.12"
 end
Save and close the Gemfile.
-
At this point, GitHub suggests testing your site locally. Use the command
$ bundle exec jekyll serveto run a test server from your computer:$ bundle exec jekyll serve > Configuration file: /Users/octocat/my-site/_config.yml > Source: /Users/octocat/my-site > Destination: /Users/octocat/my-site/_site > Incremental build: disabled. Enable with --incremental > Generating... > done in 0.309 seconds. > Auto-regeneration: enabled for '/Users/octocat/my-site' > Configuration file: /Users/octocat/my-site/_config.yml > Server address: http://127.0.0.1:4000/ > Server running... press ctrl-c to stop.In a new browser tab, navigate to
localhost:4000to see your website for the first time. -
Connect your local directory with your repository on GitHub.
First, run
$ git remote add origin https://github.com/USER/REPOSITORY.git, replacing USER with the user account that owns the repository, and REPOSITORY with the name of your GitHub Pages repo.Then push the repository to GitHub with
$ git push -u origin BRANCH, replacing BRANCH with the name of the branch you’re working on, which should bemaster.
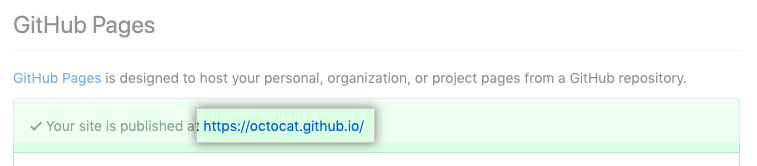
And that’s it! Your website should now be live at YOURNAME.github.io. You can check by navigating to your repo and opening the settings - if you scroll down, there will be a GitHub Pages section with a link to your site.
From there, the GitHub guide offers instructions on adding new posts and pages or customizing your theme.
3. Modify the design
If you’re like me and unfamiliar with Ruby, different elements called gems control a lot of the configurations and settings; Jekyll layout themes, like the default theme Minima, are gems.
This means much of the HTML laying out your pages is hidden away in the directory where you initially installed Ruby. Unless you selected a different location, the path should be something like C:/Ruby26x-64 > lib > ruby > gems > 2.6.0 > gems > minima-2.5.1 for Windows (which should translate to /Users/username/.rubies/ruby-2.6.2/bin/ruby on Mac). From there you can access the _layouts and _includes folders and files.
You can modify these files to change the layout of your pages from your theme’s default or add elements like the callout box above the main content on my homepage that shows my most recent blog post. But if you only change the local version of the file on your computer, the changes won’t override the default settings GitHub uses to render your site, so the live version of your website will look different than when you test it locally.
To override any of these files, all you have to do is create a new version in a _layouts or _includes folder in your website’s root directory (similar to the instructions in the guide on customizing your theme- you can also look at my website’s repository as an example).
Modifying the homepage
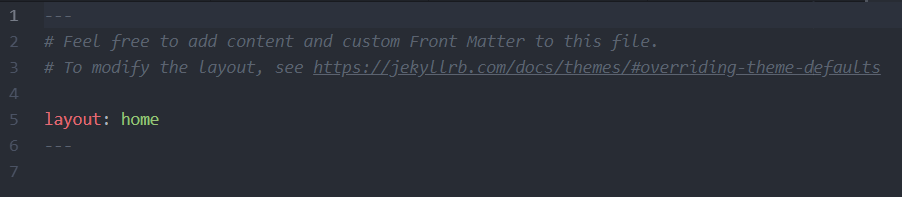
The homepage layout is controlled by the index.markdown file Jekyll placed in your root directory. If you open that file, you’ll notice the layout is home.
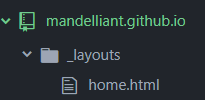
Add a _layouts folder to your root directory, then create a home.html file inside.
Copy the contents of the home.html file in your local Ruby folder into the new file in your website (or start completely from scratch if you prefer). Now in the file in your website, you can make any changes you want. Add the floating box:
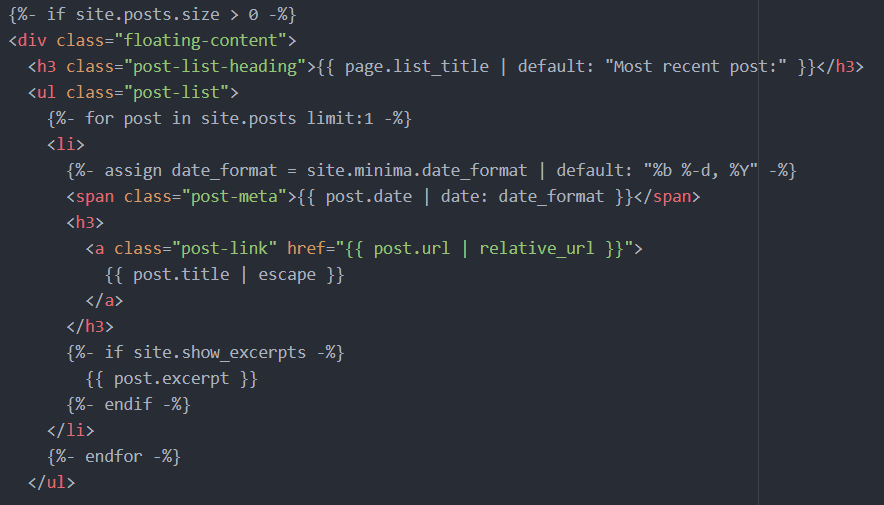
The endif tags in this code snippet were causing a Jekyll Liquid syntax error preventing the post from building locally, so you get a screenshot instead. You can find the code here.
Orienting the box on the page and styling the shadow requires some CSS. Create an Assets folder in the root directory and add a main.scss file inside to supersede the default CSS that comes with the Minima theme.
@import "minima";

.floating-content { padding: 30px 0; flex: 1; border: 1px solid;
  padding: 10px;
  margin-right: 50;
  box-shadow: 5px 10px #778899;
  background-color: #ffffff;
}
4. Set up a custom domain
GitHub makes it really easy to add your own domain for your Pages site. From your repository on GitHub, go to the settings and scroll down to the GitHub Pages section. There will be a field to input a custom domain:

This is my actual domain - thanks to a sweet project called Handshake, I own the top level domain mandelliant/. If you’re resolving HNS domains, check out writtenby.mandelliant/. I plan to write more about Handshake and setting up the domain soon.
There are baseurl and url fields in the _config.yml file in your site’s root directory, and I’m sure there’s a very good reason for them, but it seems like I’m not having any issues leaving them empty for now. If you have a custom domain you want to use, GitHub has instructions for setting it up and updating your DNS records.
Subscribe via RSS